Checking Material: Checking your footage is essential to making sure you are well prepared for editing, without the material there would be nothing to edit so the first step to being prepaid is to make sure that all your footage is good and looks the way you want it to taking into a count weather or not you are happy with things like the lighting or framing and checking that the audio is good. if not then the footage has to be re shot before editing can start, but if its good then it can be imported into your editing software and then placed into bins.
Bins: Bins are folders were all your footage is stored, you can use bins to organise you footage so it is easier to access and all relevant footage is in one place. This helps the edit flow smother as all the footage is labelled and easy to find.
Setting the Correct Import Settings: Without setting the correct import settings your footage will not look how you want it too, it may be cropped down and be of low quality no matter how it was shot, before starting you should always check your import settings.
Producing an Edit Decision List: These are important because it allows the director to tell the editor what he wants to do with the footage, as the editor wouldn't normally on set this is crucial so that the editor can understand the directors vision.
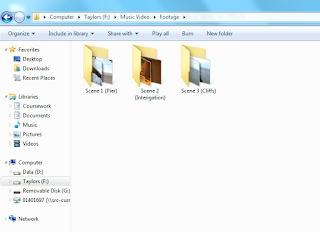
I started by copying the footage from the camera onto my hard drive.
Next I created bins. I made a bin for each scene and placed the appropriate shots into the bins, I did this so that I had a better work flow when it came to editing in premier pro. This means I could work faster and more efficiently as I could find the right shots easier
.
These are the individual shots in my bins.
I then reviewed all of the shots and then deleted the bad ones.
I then opened premier pro, giving my project an appropriate name and checking that the general settings were correct.
Next I set up my sequence settings; I used an AVCHD 1080I 25fps as it is the correct format to use with the footage from the cameras. Ensuring it will be high quality.
These are my bins in premier pro, creating bins first helped me work efficiently.
After I had finished editing the clips together and making sure that the audio was synced with the visuals, I added titles to the start of the video to credit the song and artist.
During editing I used multiple tracks to help organise my edit, I put master shots on the bottom track and overlaid the other shots with different angles above. I also used effects such as fade ins and fade outs and the start and end of my music video on both the video and audio. I ended with a dip to black to make the last shot extra dramatic.
After I was finished rendering my work area I was ready to export my music video. I exported it as a quick time file as then it would be in 1080I.
After this I burnt my music video to disc.
As well as this me and my team created shot lists for the music video, evidence of which can be found in our production folder.


No comments:
Post a Comment